
Fix a Leaky Faucet
HammerNest helps Freeport-area homeowners review localized faucet leaks, handle moisture, loose faucet bodies, sink-edge caulk, under-sink access, and minor plumbing boundaries.
Fast response. Quality work. Fair pricing.
Localized faucet leak review
Help with common leaky faucet problems in Freeport, IL
HammerNest reviews localized faucet problems in Freeport, IL, including steady spout drips, moisture around handles or the faucet base, loose faucet bodies, and leaks connected to pull-down or side sprayers.
The faucet type, leak location, sink surface, under-sink access, and surrounding cabinet condition should be reviewed together before the next step is clear.
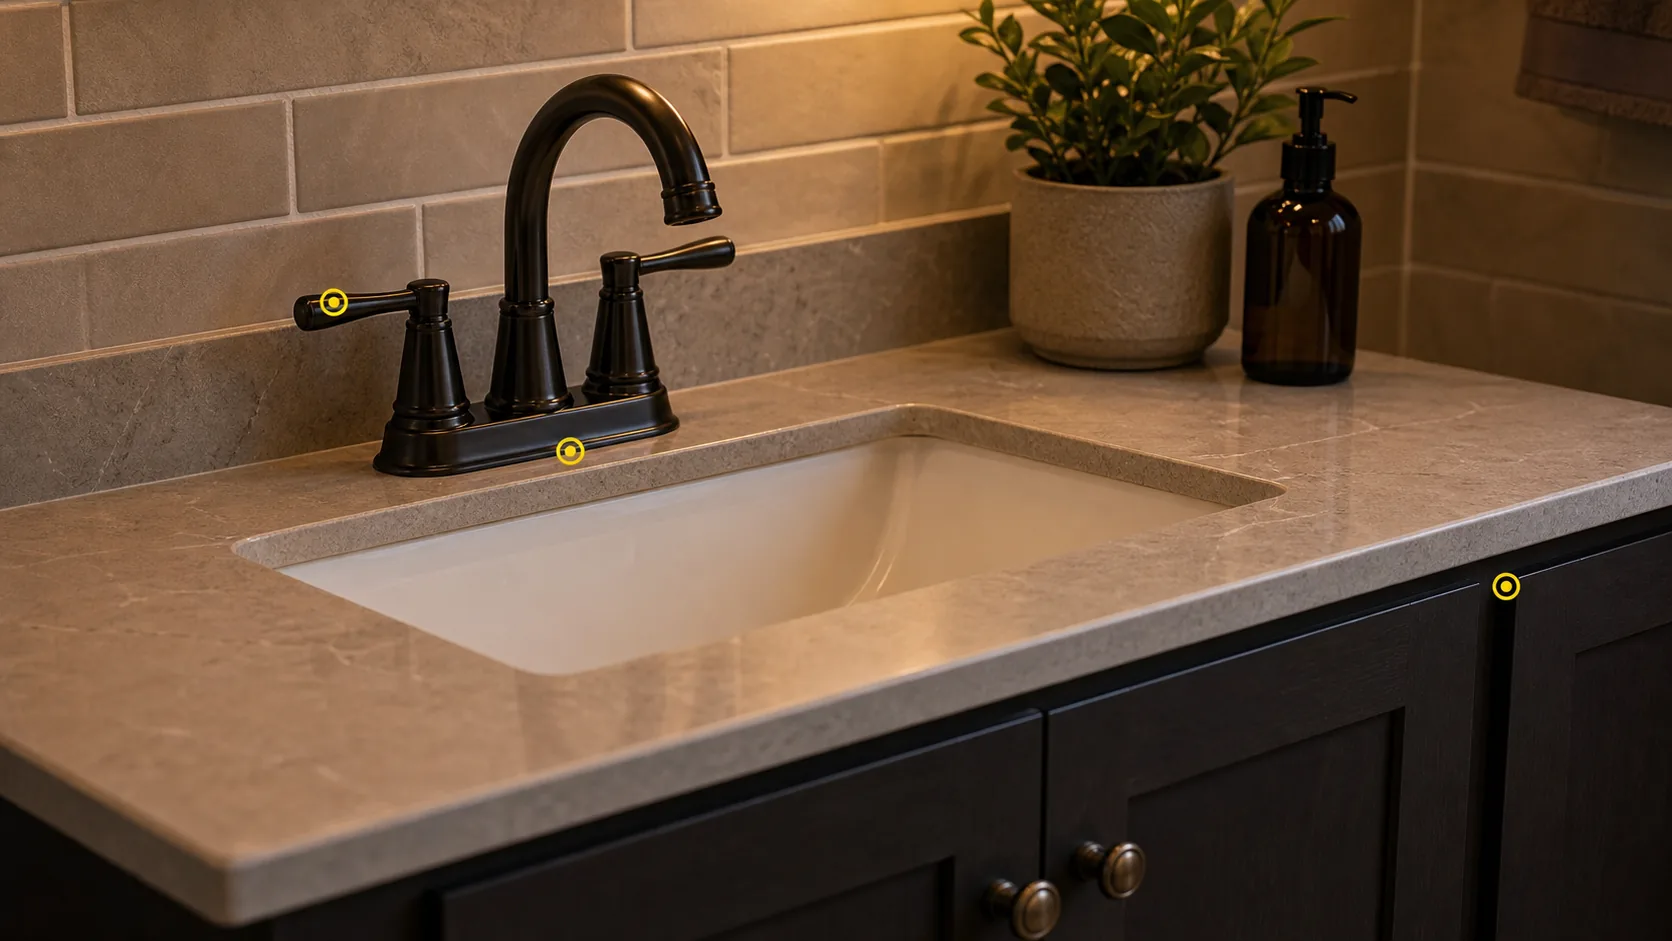
Dripping from the spout
A faucet that continues dripping after the handles are turned off may involve internal faucet components. Send a short video showing the drip rate.
Leaks around the handles
Water appearing beneath a handle or around its base may involve the handle assembly, stem or cartridge area, or surrounding seal.
Moisture at the base
Water around the faucet base can come from mounting movement, sink-deck condition, splashback, failed sealant, or a connection below.
Sprayer and hose concerns
Pull-down and side sprayers can leak at the head, hose, connection, or docking point. Show the complete sprayer path when visible.
Kitchen, bath, laundry, or utility sinks
Submit every affected faucet in one request and identify the room, sink type, faucet style, and visible cabinet condition.
Describe when the faucet leaks: constantly, only while running, after shutoff, at one handle position, or after the sprayer is used.
Send the full sink view, close-ups, short video, faucet details, under-sink photos, and visible cabinet condition.
Project intake checklist
What to send with your leaky faucet repair request
Clear photos, a short leak video, and basic faucet details help show where the water appears, when it happens, what connections are visible, and whether the request looks limited to the faucet or involves a broader plumbing concern.
Full sink and faucet view
Take one wide photo showing the complete faucet, sink, countertop, backsplash, cabinet, and nearby fixtures.
Leak location and timing
Add close-ups and a short video showing whether water appears at the spout, handle, base, sprayer, hose, or beneath the sink.
Faucet model and parts
Include the brand, model number, product link, visible labels, packaging, receipts, or owner-supplied cartridges, washers, hoses, and hardware.
Safe under-sink photos
Photograph the shutoff valves, supply lines, faucet mounting area, drain components, and cabinet floor without disconnecting anything.
Surface and cabinet condition
Show corrosion, staining, swelling, softness, previous sealant, damaged cabinet material, and any stored items that limit access.
Do not turn questionable valves, disconnect supply lines, remove cartridges, or open plumbing for photos. Show visible conditions safely.
Gather wide views, leak close-ups, model details, safe cabinet photos, owner-supplied parts, and surface condition notes.
How it works
Narrow the faucet leak before follow-up.
A short video and safe under-sink photos are often more helpful than guessing which part is failing.
- Send repair detailsShare photos, location, urgency, and the best way to reach you.
- Upload photos if helpfulWide and close-up photos make the first review clearer.
- Choose call or text follow-upTell us how you prefer to handle the next step.
- Get the next stepIf the job fits, timing, materials, and the repair plan are confirmed.


Leak location check
The leak location helps narrow down what should be checked
Water around a sink does not always come from the same place. Showing where moisture first appears and whether it happens while running, after shutoff, or during sprayer use helps separate a faucet issue from sink-edge, supply-line, valve, drain, or cabinet concerns.
The goal is to document the symptom clearly without taking the faucet apart or treating photos as a final diagnosis.
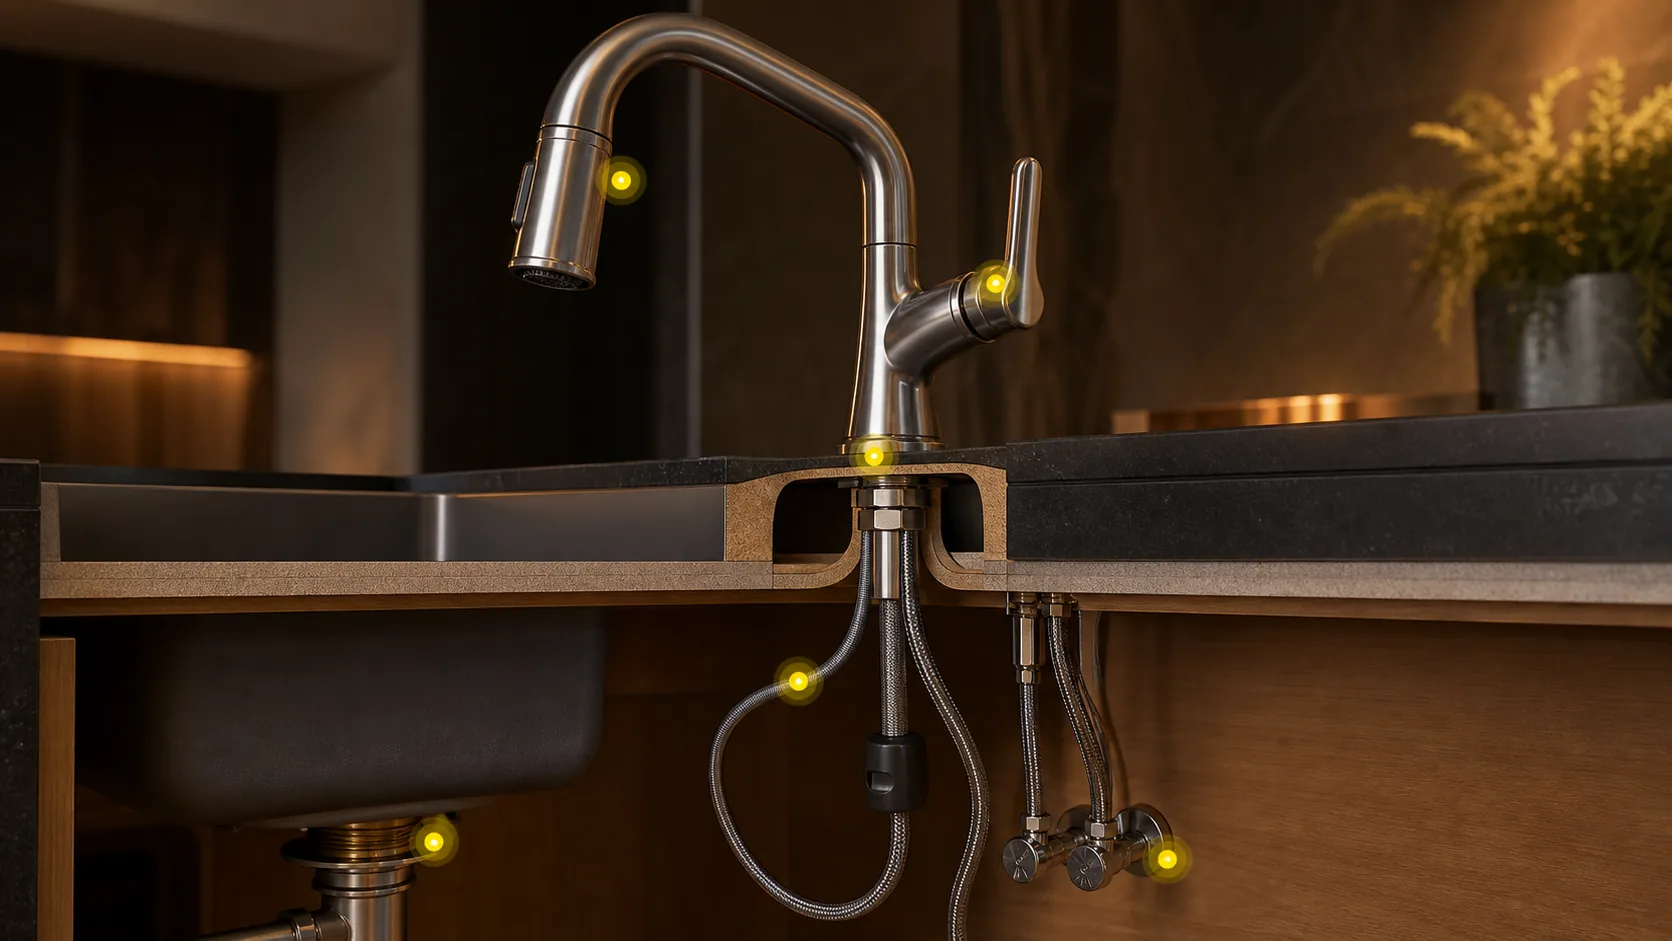
Spout drip
A faucet that continues dripping after shutoff may involve internal faucet components. Record how long the drip continues after normal use.
Handle leak
Water appearing around one handle may involve the handle assembly, stem or cartridge area, or the seal beneath it.
Faucet-base moisture
Water around the faucet body may come from loose mounting, a failed surface seal, splashback, or a connection below.
Sprayer path
Pull-down heads and side sprayers can leak at the head, hose, connection, or docking point. Show the hose if safely visible.
Below the sink
Moisture in the cabinet may come from the faucet, supply lines, valves, sink edge, drain, or another nearby source.
Dry the visible area, observe normal use, and document where moisture first appears. Do not remove parts for photos.
Send the spout, handle, base, sprayer, and under-sink views with a short note about when water appears.

Faucet and parts matching
Faucet type and replacement parts need the right match
Single-handle, two-handle, widespread, centerset, pull-down, and utility faucets can use different cartridges, stems, washers, seals, hoses, and mounting parts.
Clear model information and photos help determine whether an owner-supplied replacement component appears compatible with the existing faucet before a repair path is assumed.
Faucet style
Photograph the complete faucet and note whether it has one handle, two handles, a separate sprayer, or a pull-down head.
Brand and model details
Include visible labels, model numbers, product links, packaging, receipts, or manufacturer instructions when available.
Internal components
Cartridges, stems, washers, O-rings, aerators, hoses, and handles can vary by brand and model even when parts look similar.
Mounting hardware
Escutcheon plates, nuts, brackets, washers, fasteners, and supply connections should match the existing sink and faucet setup.
Part condition
Corrosion, stripped hardware, damaged threads, discontinued parts, or incompatible replacements may change whether a small repair remains practical.
Keep owner-supplied parts packaged and grouped with the faucet request until the fit is reviewed.
Send full faucet photos, model details, packaging, visible markings, and every owner-supplied component.
Faucet mounting and sink-edge check
A loose faucet or wet sink edge should be reviewed with the mounting surface
A faucet that rocks, rotates, or leaves moisture around its base may involve loose mounting hardware, failed sink-edge caulk, splashback, or damage in the countertop or sink deck.
The faucet, mounting surface, surrounding joints, and cabinet below should be reviewed together before the water source is assumed.
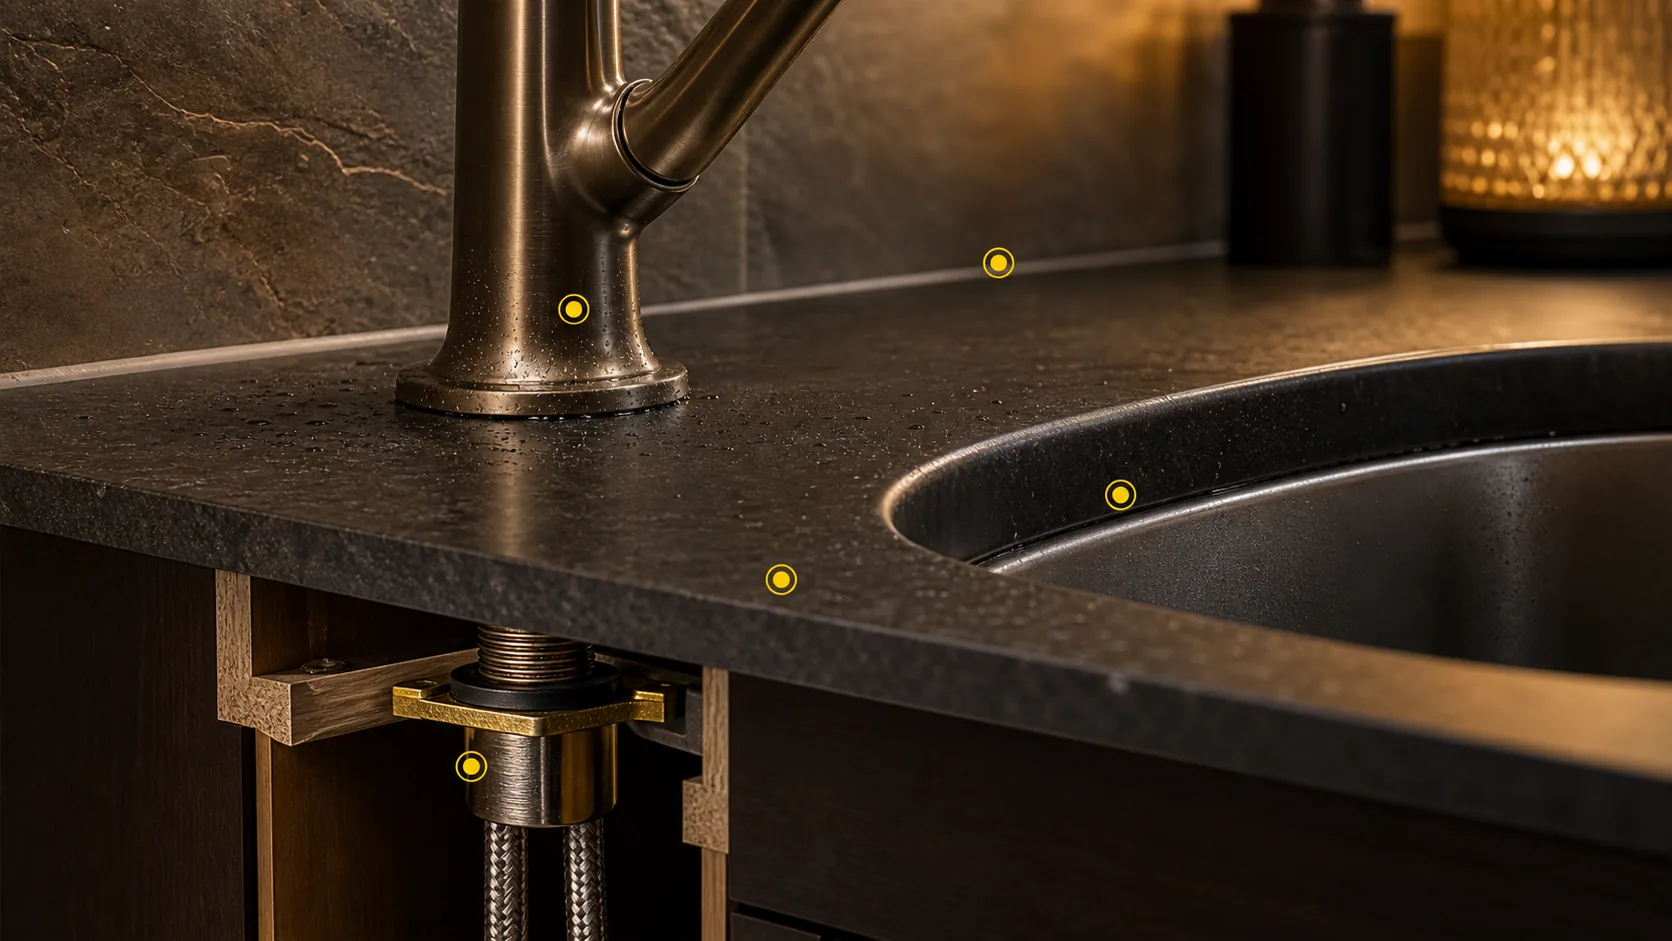
Faucet base
Show whether the faucet body shifts during normal use and where moisture collects around the base or escutcheon plate.
Mounting condition
Photograph the accessible mounting area beneath the faucet without loosening hardware or disconnecting supply lines.
Sink edge
Water around the sink rim, faucet holes, or countertop edge can come from splashback, failed sealant, or surface movement.
Backsplash and caulk
Failed caulk where the sink, backsplash, countertop, and wall meet should be shown with the full joint and surrounding material.
Surface condition
Swollen laminate, loose tile, cracked stone, soft wood, or damaged sink-deck material can affect whether a surface repair will hold.
Repeated faucet movement may keep a surface seal from remaining intact until the mounting and surrounding material are understood.
Send base close-ups, sink rim, backsplash, cabinet underside, surface condition, and any movement during normal use.
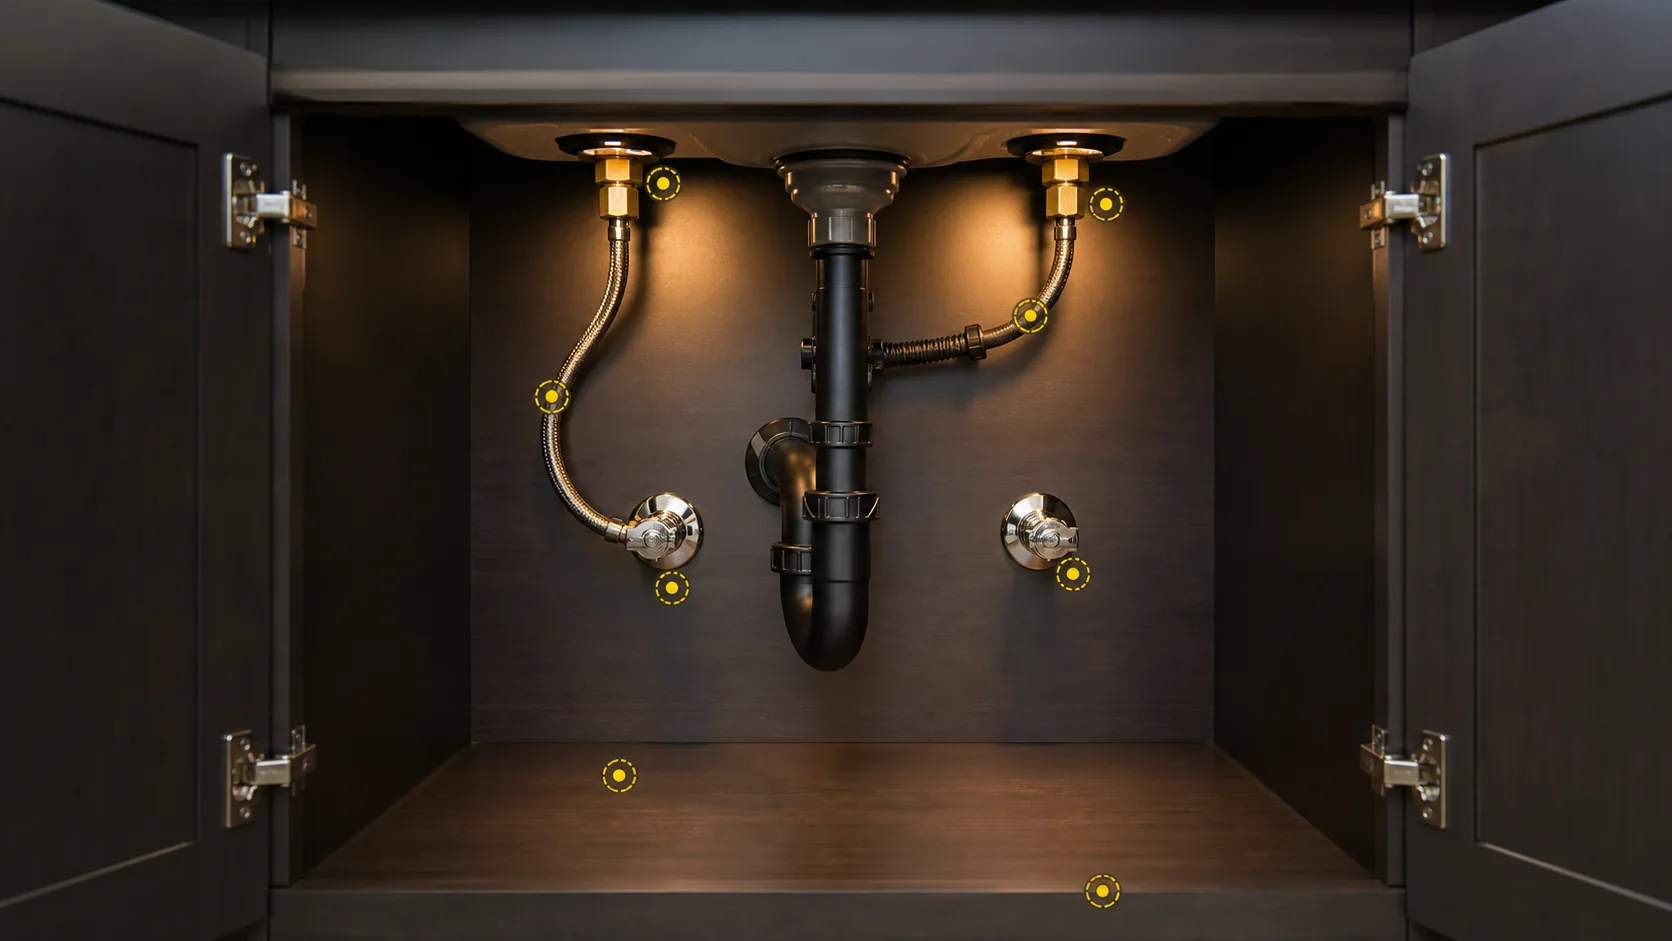
Under-sink access check
Under-sink access and existing connections affect the repair scope
The space below the sink helps show whether the faucet is accessible, where moisture appears, and whether the visible connections remain intact.
Shutoff valves, supply lines, mounting hardware, drain components, stored items, and cabinet condition should be reviewed together without disconnecting anything.
Shutoff access
Photograph the existing hot and cold shutoff valves and show whether they are visible and reachable. Do not force questionable valves.
Supply-line condition
Include clear photos of visible supply lines, fittings, and connection areas. Show kinks, corrosion, staining, damaged coverings, or moisture.
Cabinet access
Tight cabinets, disposals, filters, stored items, shelving, and plumbing layouts can limit access to the faucet mounting area.
Cabinet condition
Cabinet floors and side panels should be checked visually for swelling, softness, staining, previous repairs, or damaged material.
Other connections
Drain components, disposals, filters, valves, and surrounding fixtures may need to be separated from the faucet if water appears elsewhere.
An accessible shutoff is different from a damaged, leaking, seized, or missing valve. Flag questionable valves before work is planned.
Send cabinet photos, shutoff views, supply lines, drain area, mounting points, stored-item access, and any visible moisture or damage.
Estimate factors
What affects an estimate to fix a leaky faucet
The repair scope depends on the faucet type, where the water appears, replacement-part compatibility, under-sink access, surrounding surface condition, and whether the issue remains localized to the faucet or involves broader plumbing concerns.
Faucet and leak location
A steady spout drip is different from moisture around a handle, faucet base, sprayer, supply line, or cabinet.
Replacement parts
Faucet brand, model, cartridge style, seals, hoses, aerators, and owner-supplied components may affect the repair.
Shutoffs and access
Accessible shutoff valves, visible supply lines, and reachable mounting hardware make the visible scope easier to review.
Surface condition
Sink-deck, countertop, backsplash, caulk, cabinet, and mounting surfaces can change whether a localized repair is practical.
Previous repairs
Old sealant, corroded hardware, damaged threads, failed previous repairs, and incompatible parts can expand the request.
Scope boundary
A localized faucet issue is different from valve replacement, concealed plumbing, active drain leaks, or widespread water damage.
Photos can clarify the visible problem, but they should not be treated as a guaranteed diagnosis or fixed-price faucet repair package.
Clear photos, a short video, model details, safe under-sink views, and surface notes help HammerNest review the practical next step.
Project boundaries
When a leaky faucet may need a broader plumbing plan
Some faucet leaks involve damaged valves, failing supply lines, drain components, concealed plumbing, or water damage beyond the fixture itself. These conditions should be separated from a localized faucet request and reviewed by an appropriate plumbing provider.
Related localized caulk, cabinet, trim, or fixture-mounting items can still be submitted with the faucet request when each item is documented separately.
Faucet work outside localized handyman review
Shutoff valve problems
Leaking, missing, seized, badly corroded, or inaccessible shutoff valves may need attention before faucet work proceeds.
Supply-line damage
Cracked lines, corroded fittings, active moisture, or visibly deteriorated connections can indicate a broader plumbing concern.
Drain or uncertain leaks
Water from the trap, drain, disposal, or an uncertain source should be separated from a basic faucet issue.
Concealed plumbing
New water lines, relocated plumbing, wall opening, valve replacement, or concealed pipe work requires a different plan.
Whole-system symptoms
Low pressure across several fixtures, repeated water loss, frozen pipes, or whole-home plumbing symptoms should be separated.
Water damage
Widespread cabinet swelling, mold concerns, soft flooring, or damage extending into walls may need another provider first.
One submitted list does not guarantee one provider, repair method, or appointment.
Share every faucet, leak location, under-sink condition, supplied part, and broader plumbing concern in one organized request.
Service hub
Related faucet and surface repair paths.
These pages may fit the same faucet, caulk, cabinet, fixture, or small repair request.
 Faucet and Minor Plumbing RepairsNeed faucet and minor plumbing repairs in Freeport, IL? HammerNest reviews photos, scope, materials, and timing for practical handyman help nearby.View Service ->
 Weatherproofing and CaulkingNeed weatherproofing and caulking in Freeport, IL? HammerNest reviews photos, scope, materials, and timing for practical handyman help nearby.View Service ->
 Cabinet RepairNeed cabinet repair in Freeport, IL? HammerNest reviews photos, scope, materials, and timing for practical handyman help nearby.View Service ->
 Request EstimateSend photos, timing, property details, and repair notes so HammerNest can review your handyman request before the next step.View Service ->


 Not sure if we cover your area?


